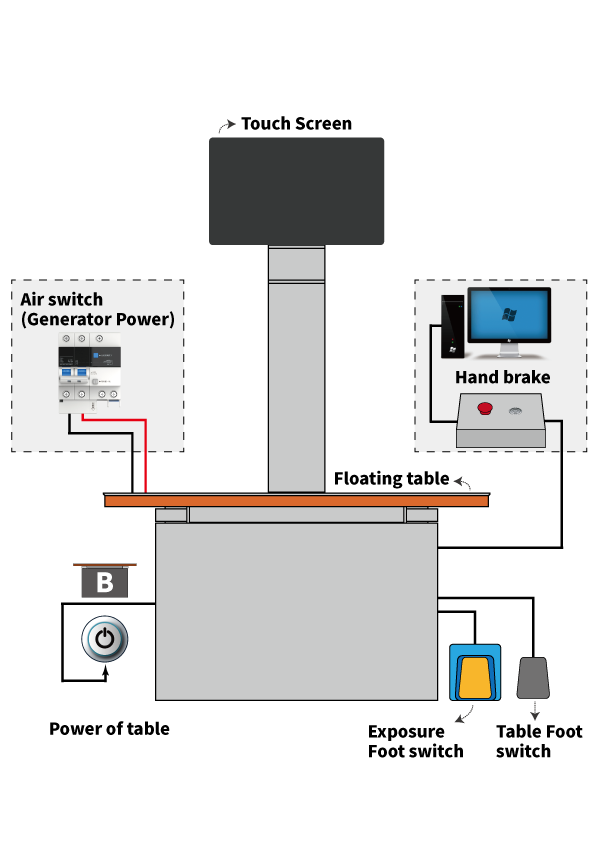
System Overview
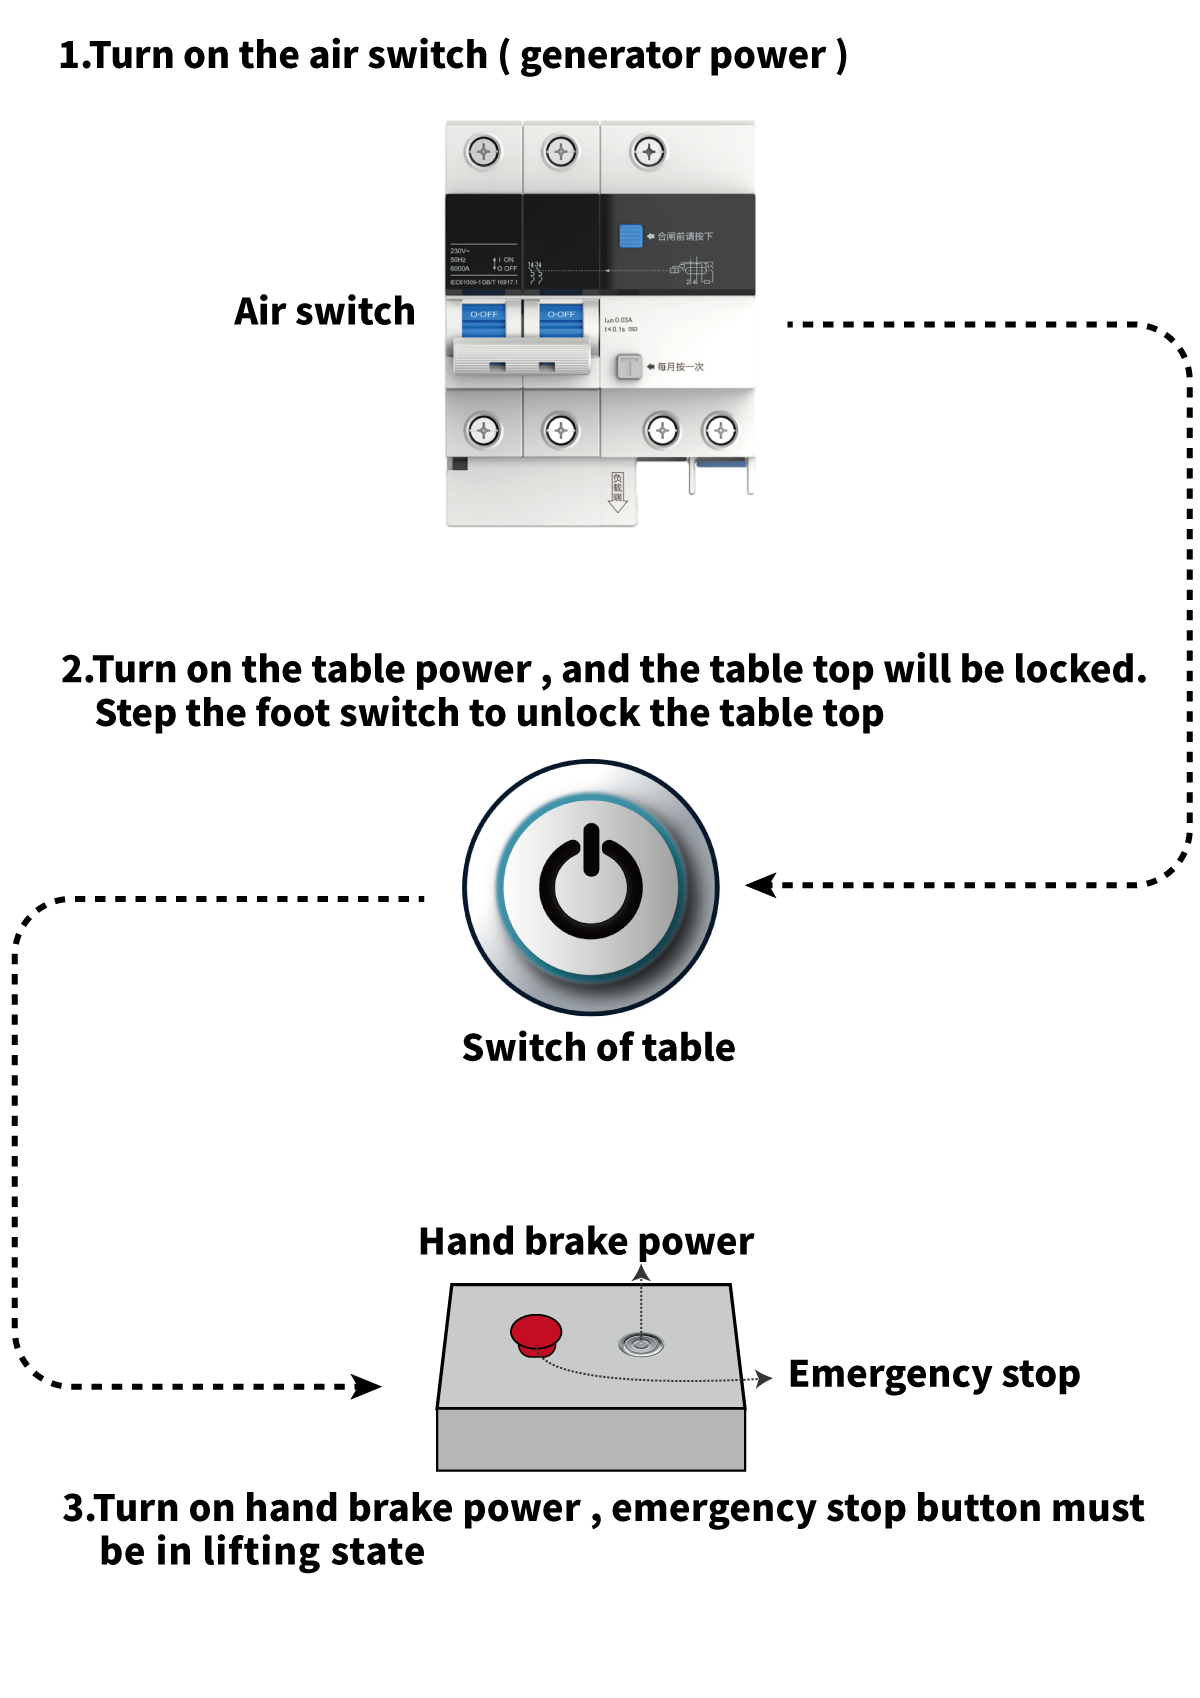
PARTⅠ: Turn on the system power
PARTⅡ: Image acquisition workflow
1.Double click image acquisition software on PC desktop
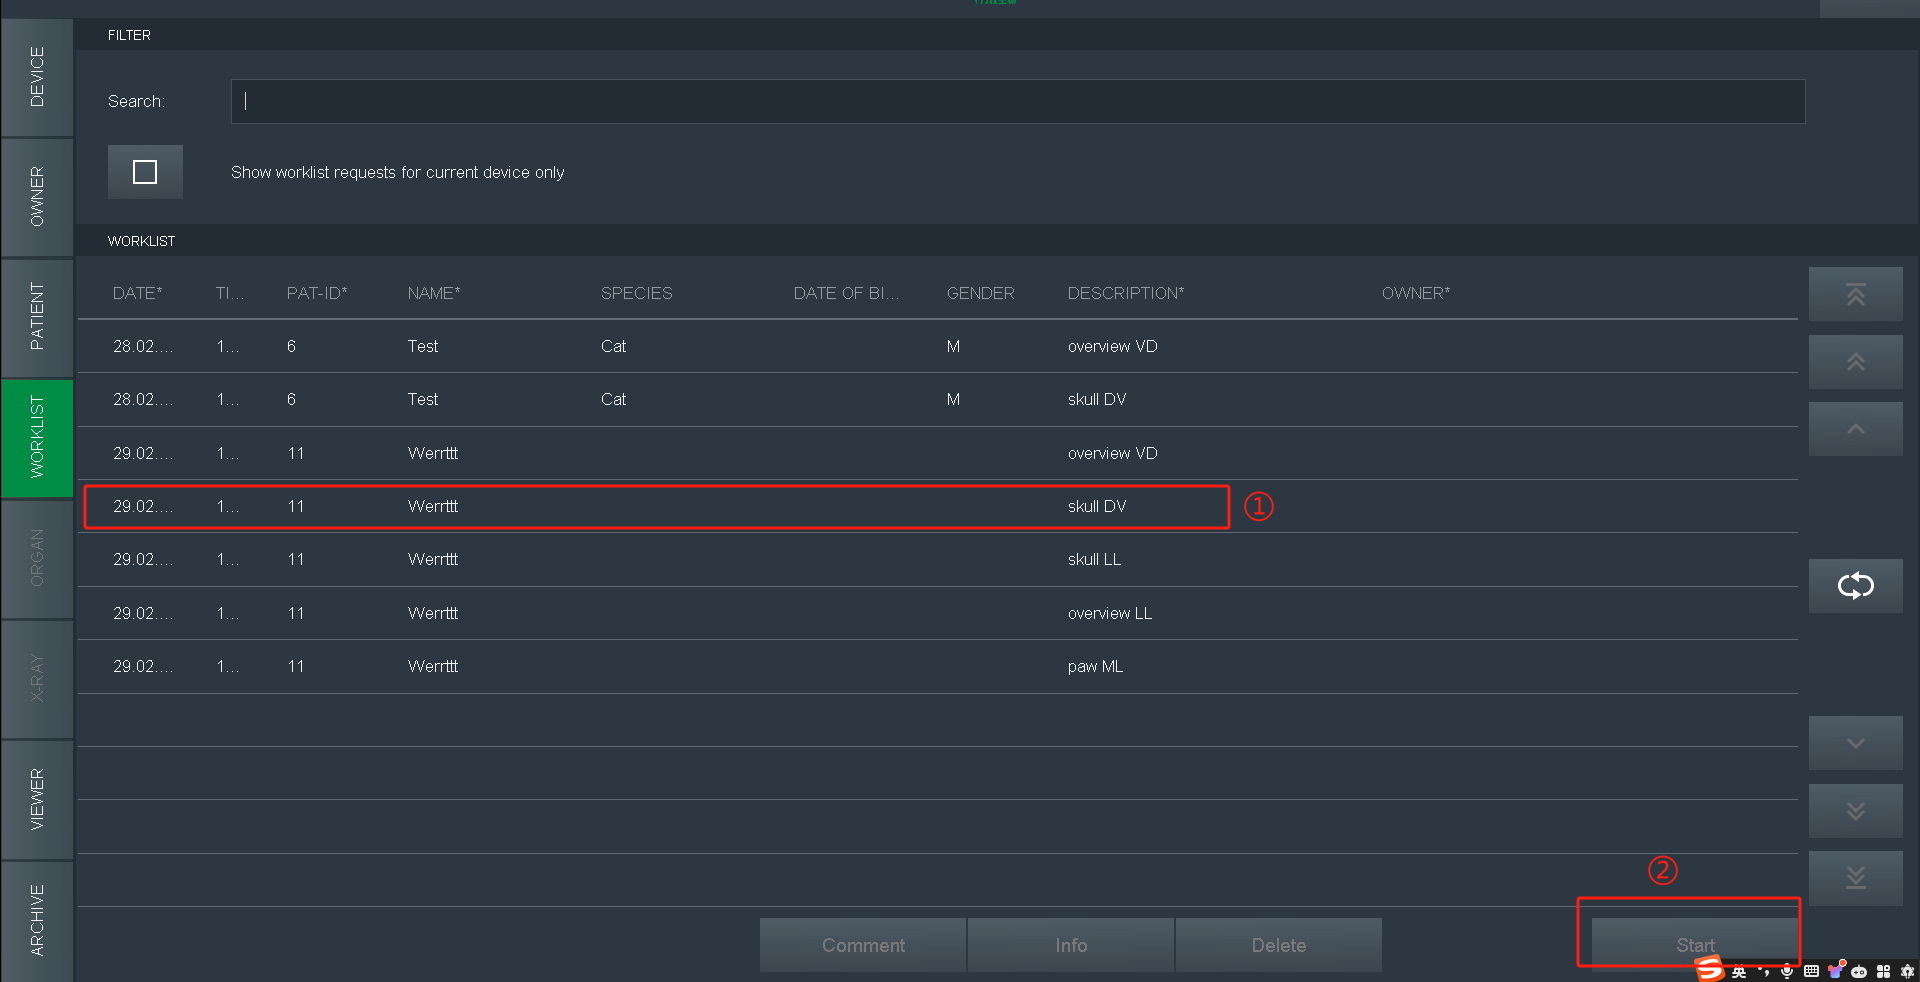
2.The default page is WORKLIST, go for history work-list and click Start to exposure
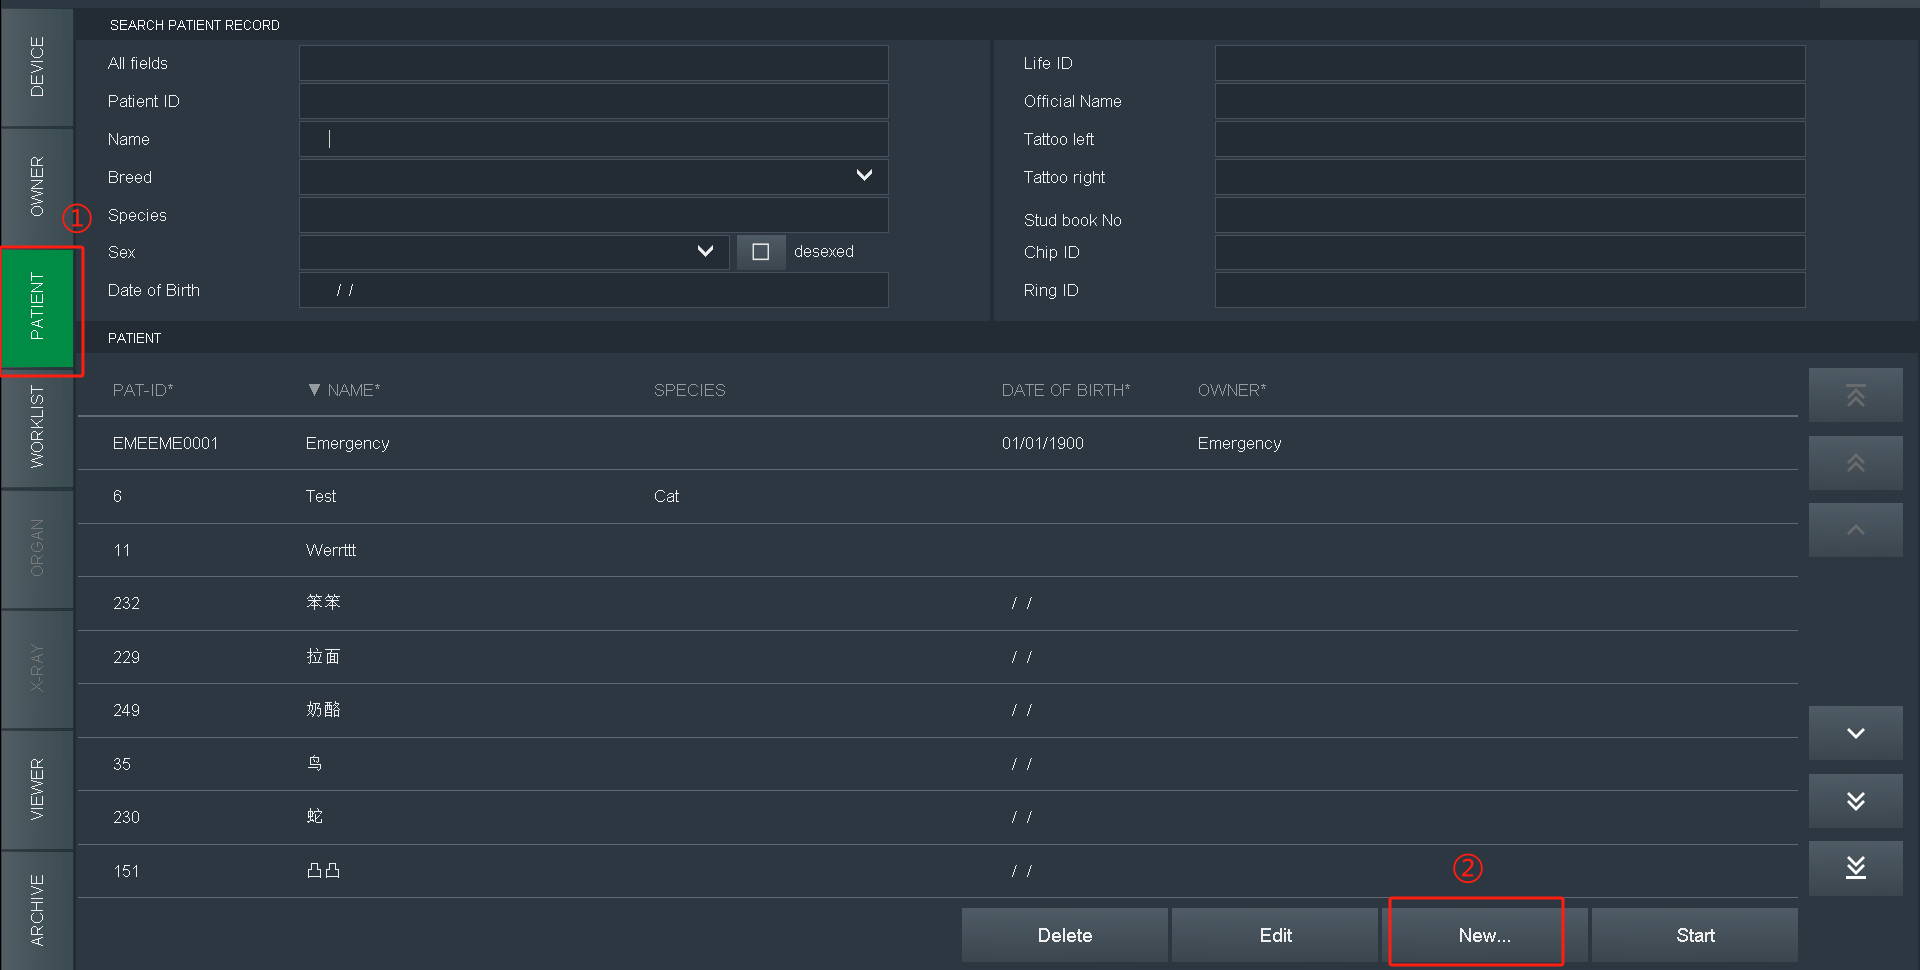
3.For new patient,Select PATIENT, and click New
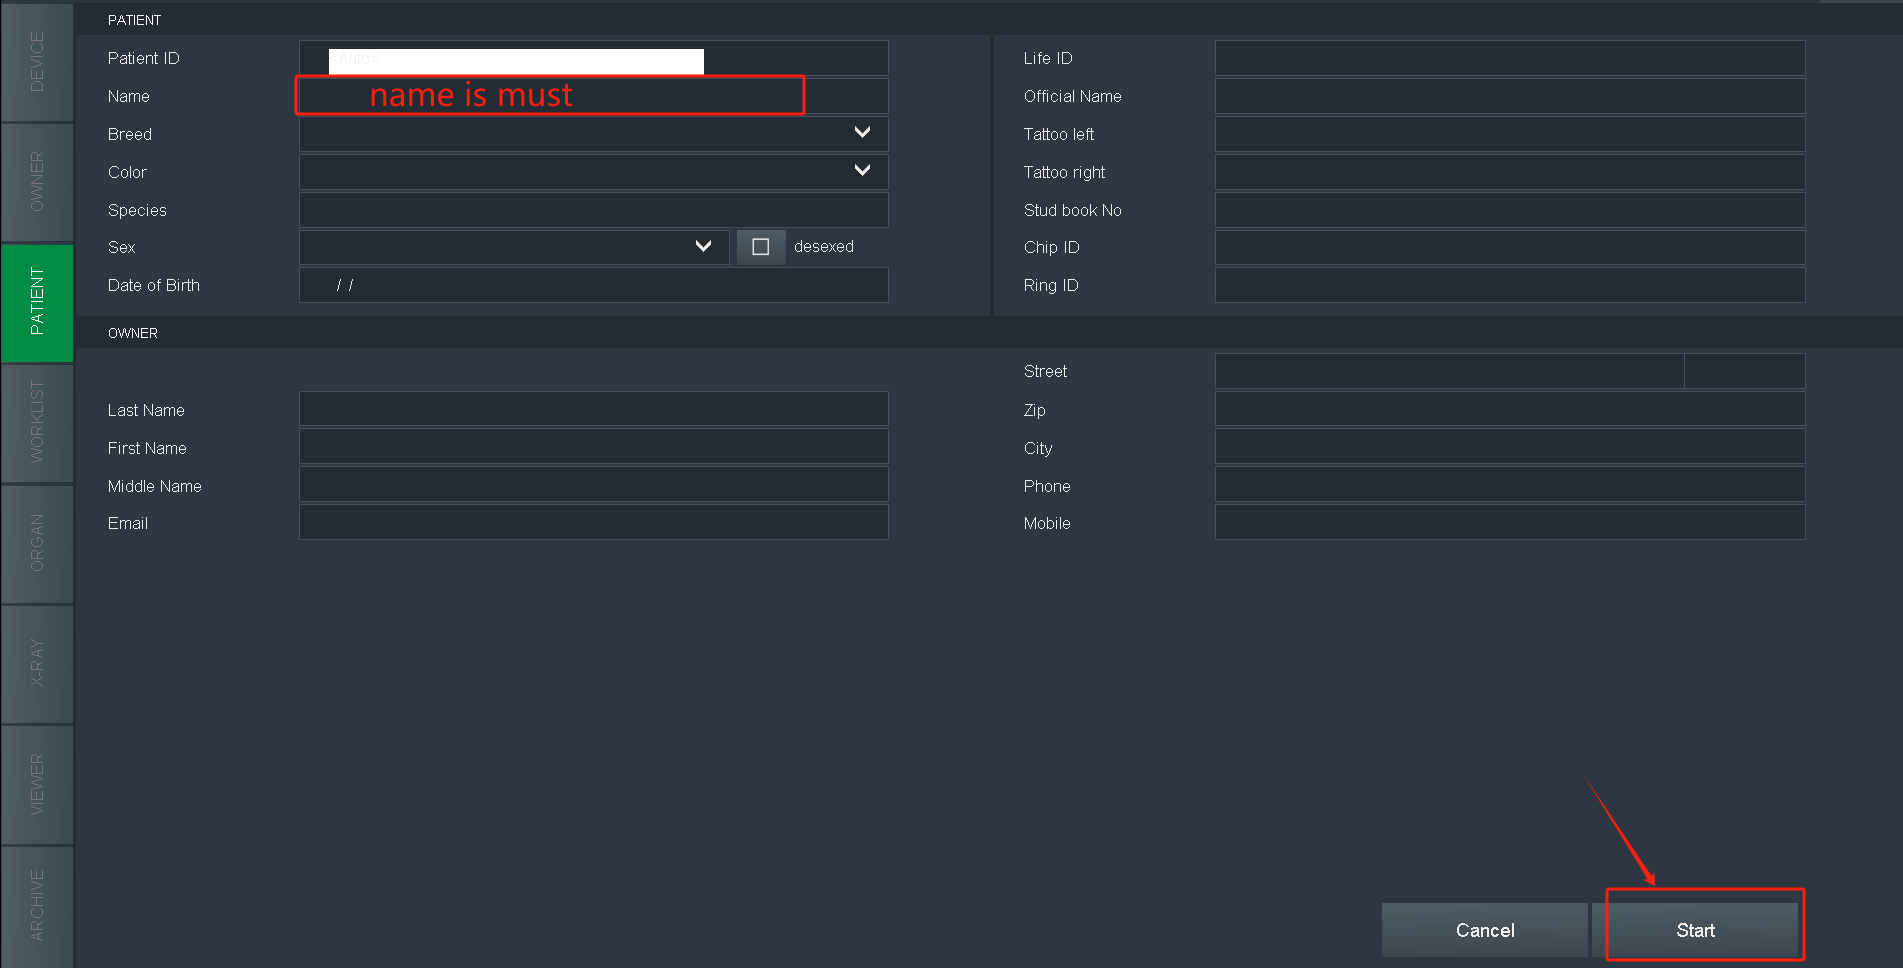
4.Fill in patient info(name is a must), click Start
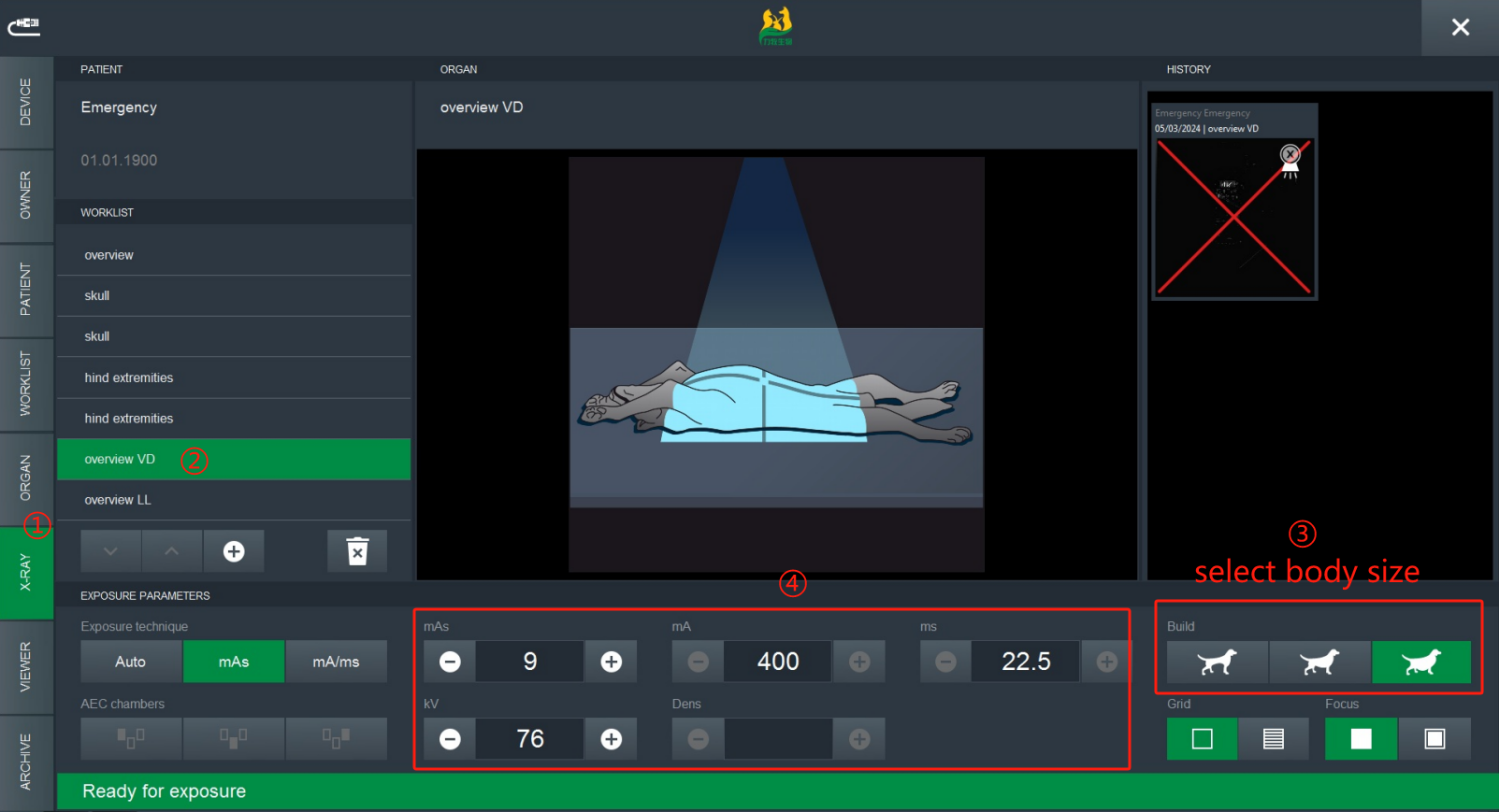
5.Select species. Choose according to the species and body size

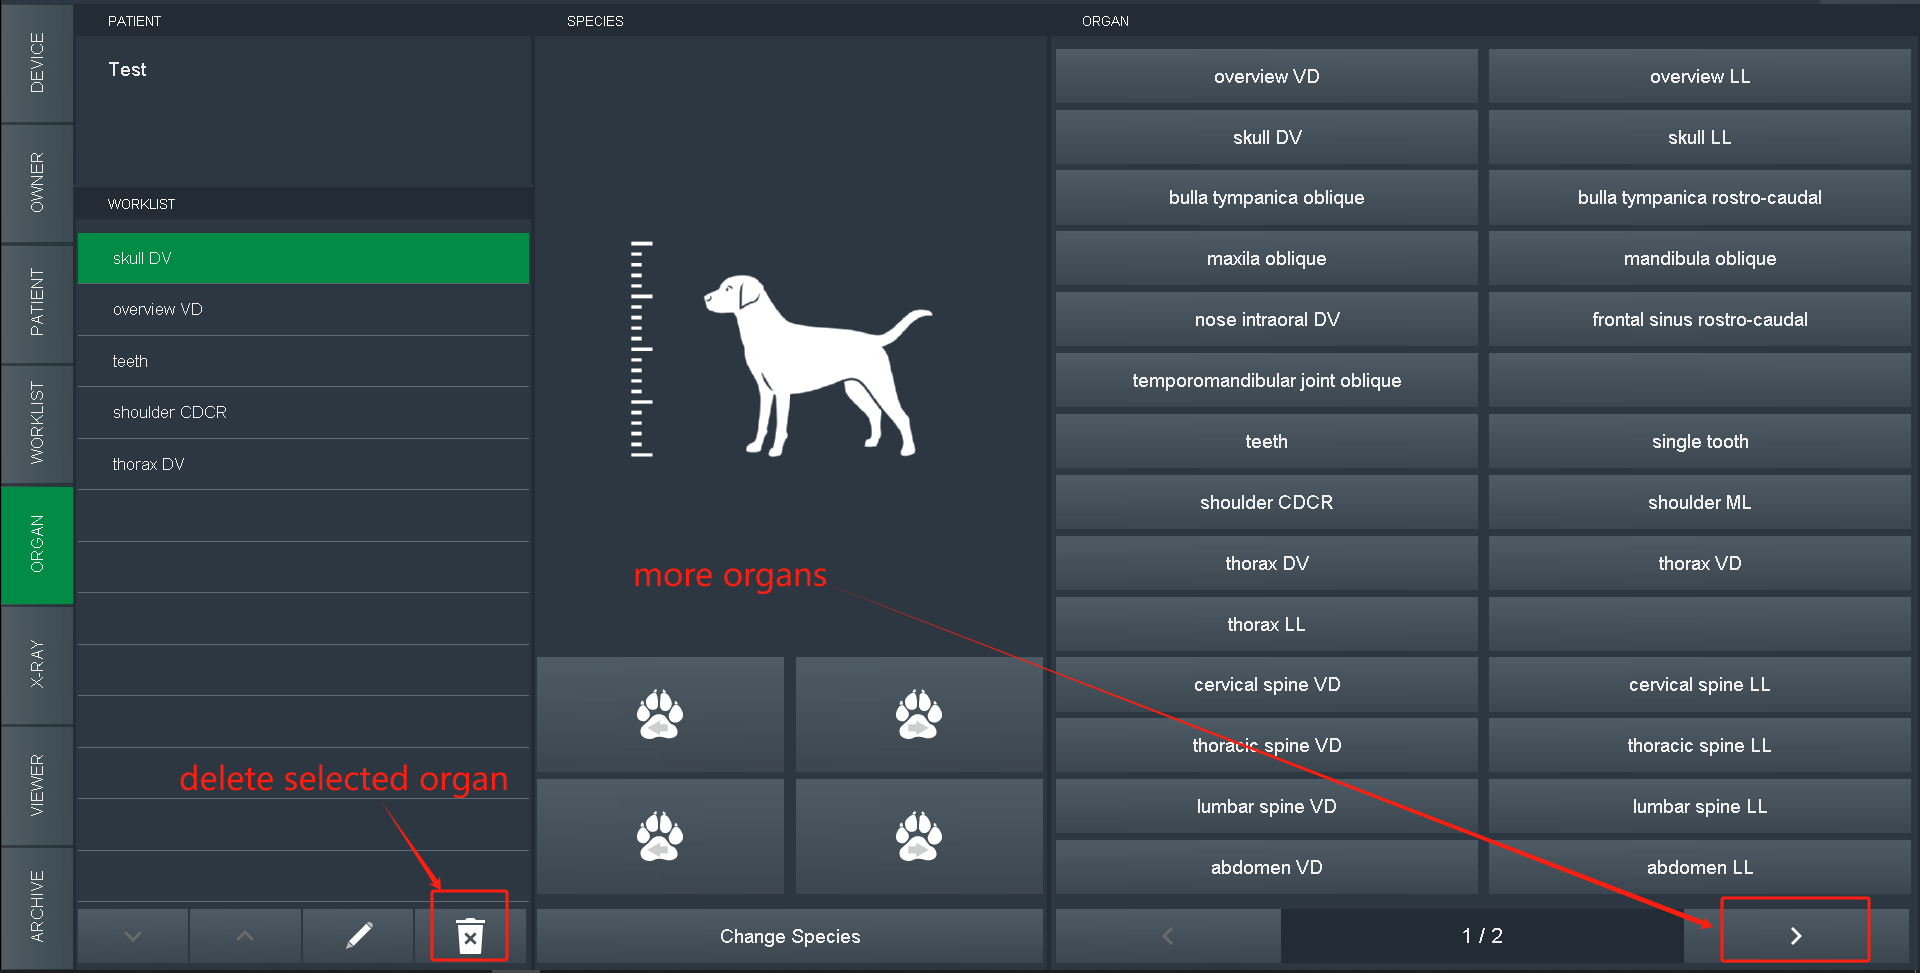
6.Select organs and position
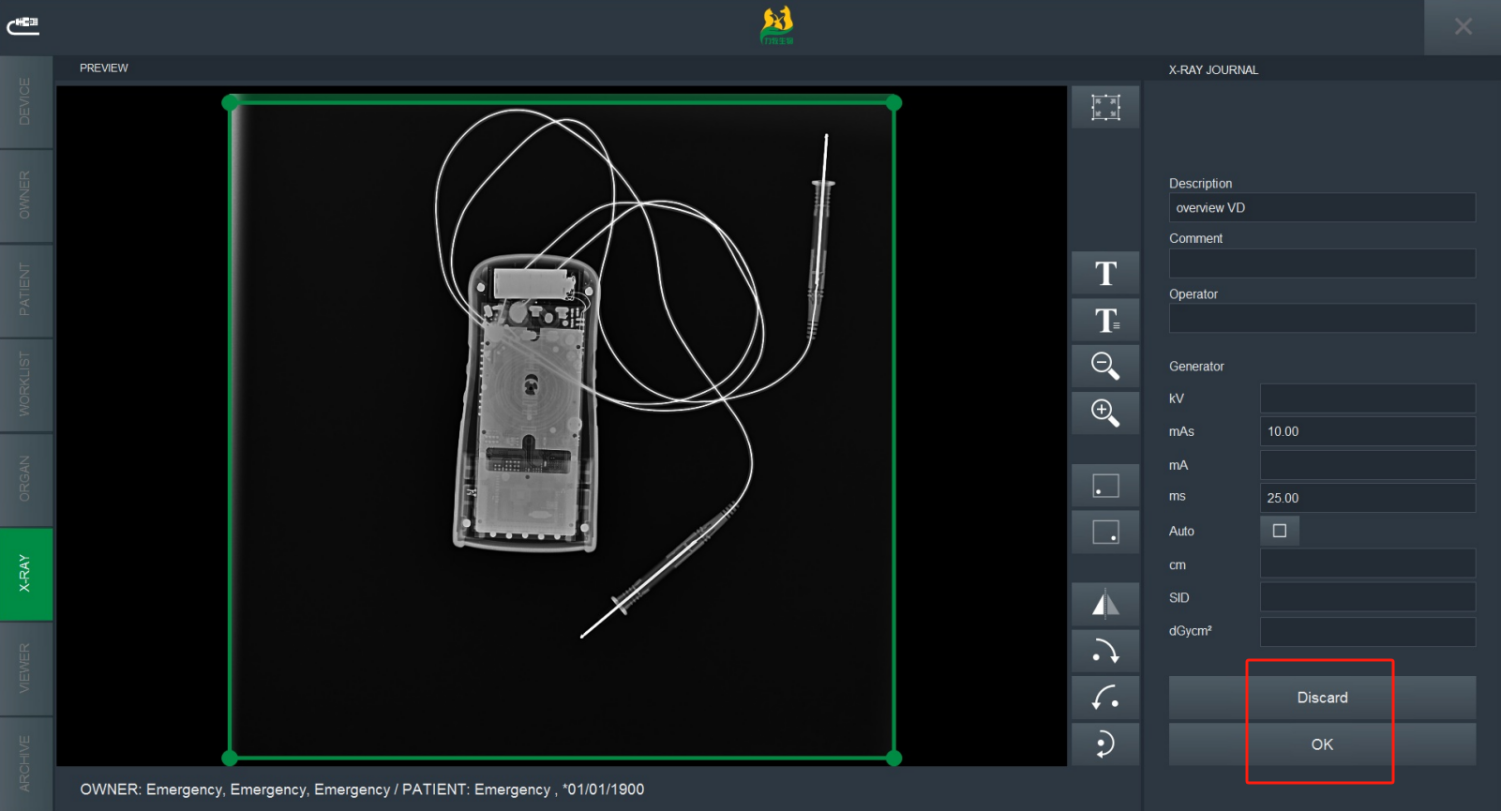
7.Select X-RAY, use hand brake or step foot switch to exposure, click OK or cancel after image obtained
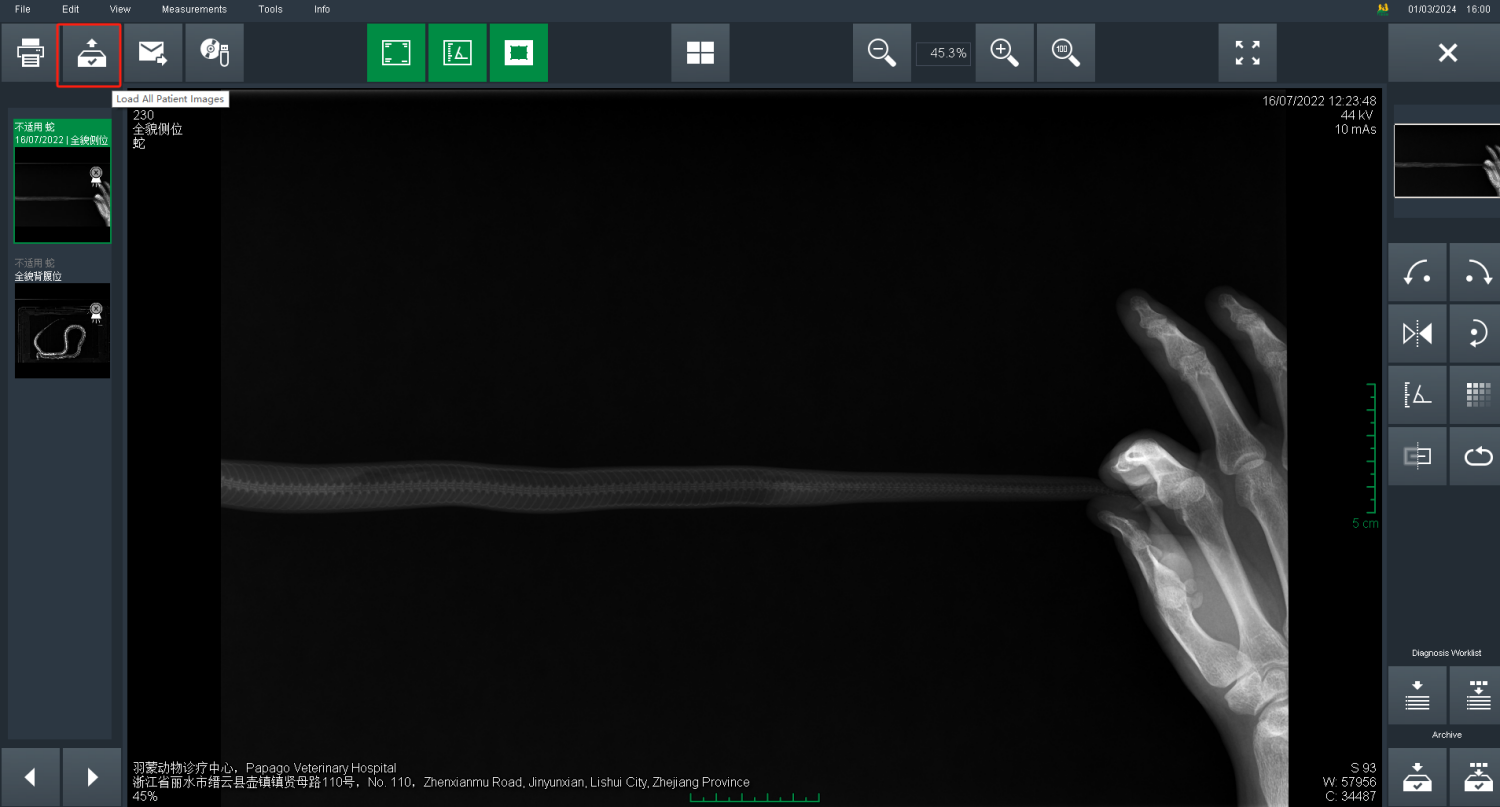
8.The images are in VIEWER temporary, click the button to Load all patient images
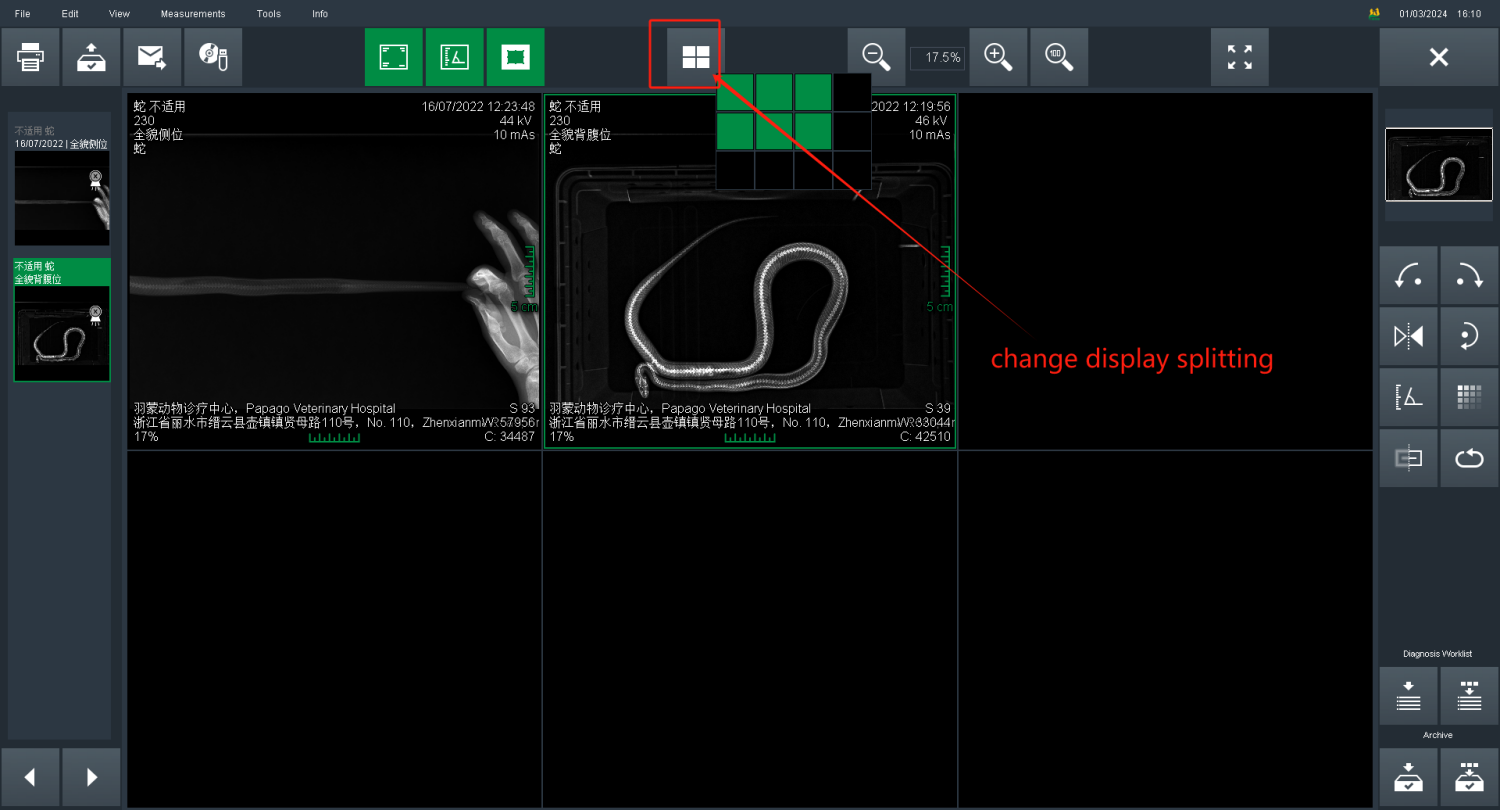
9.Display splitting
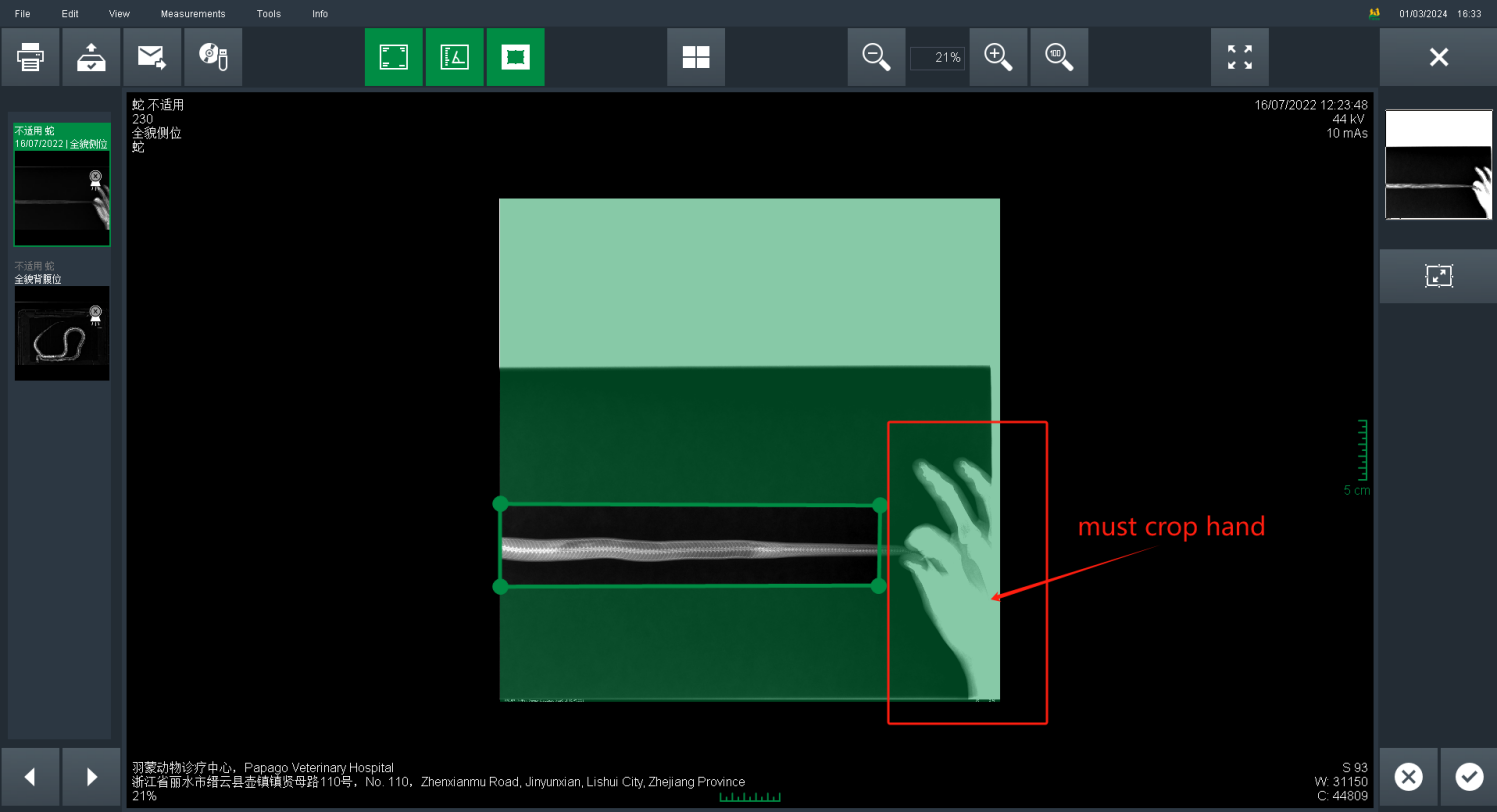
10.Right click image , select Edit X-ray Shutter

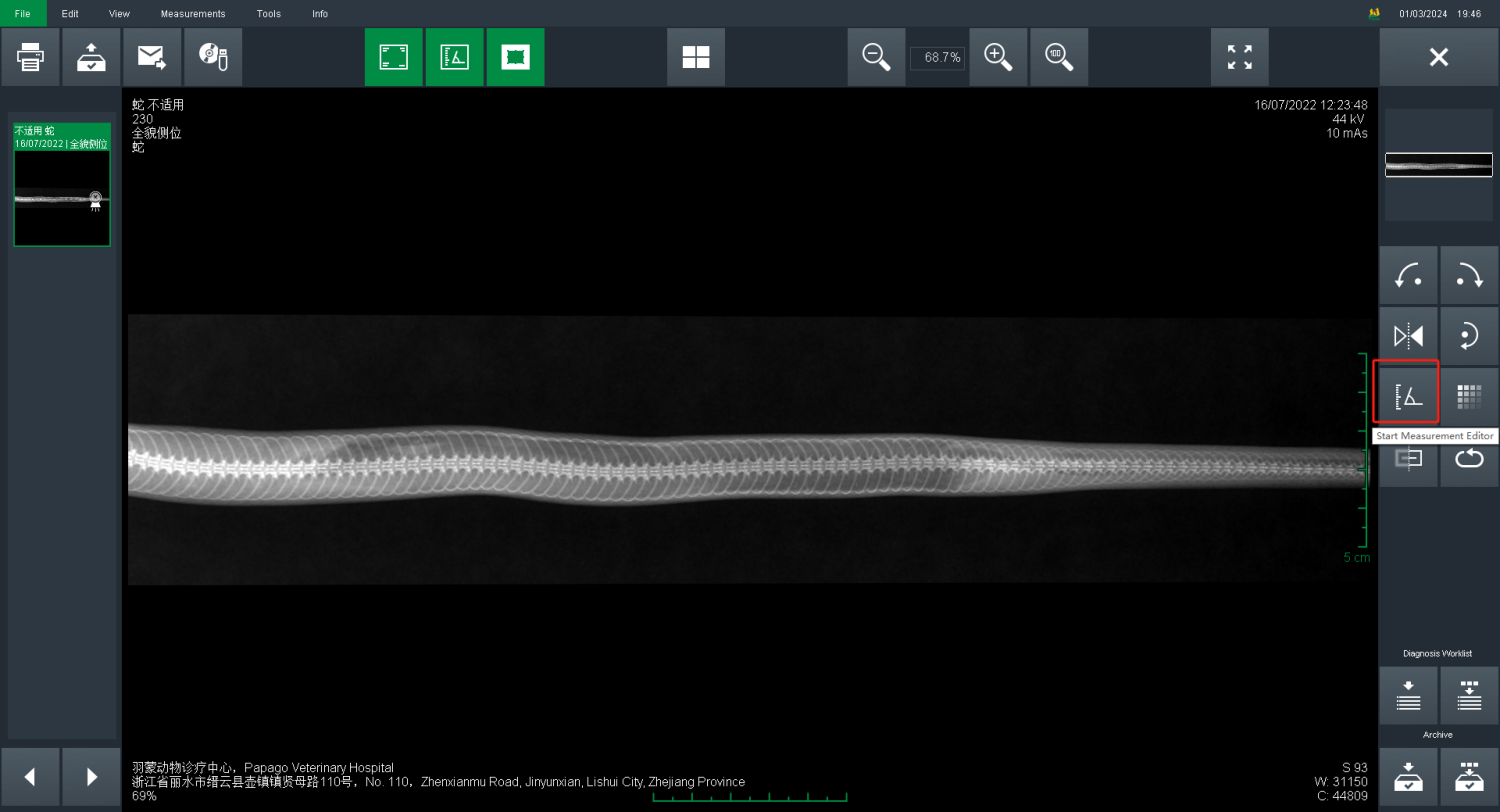
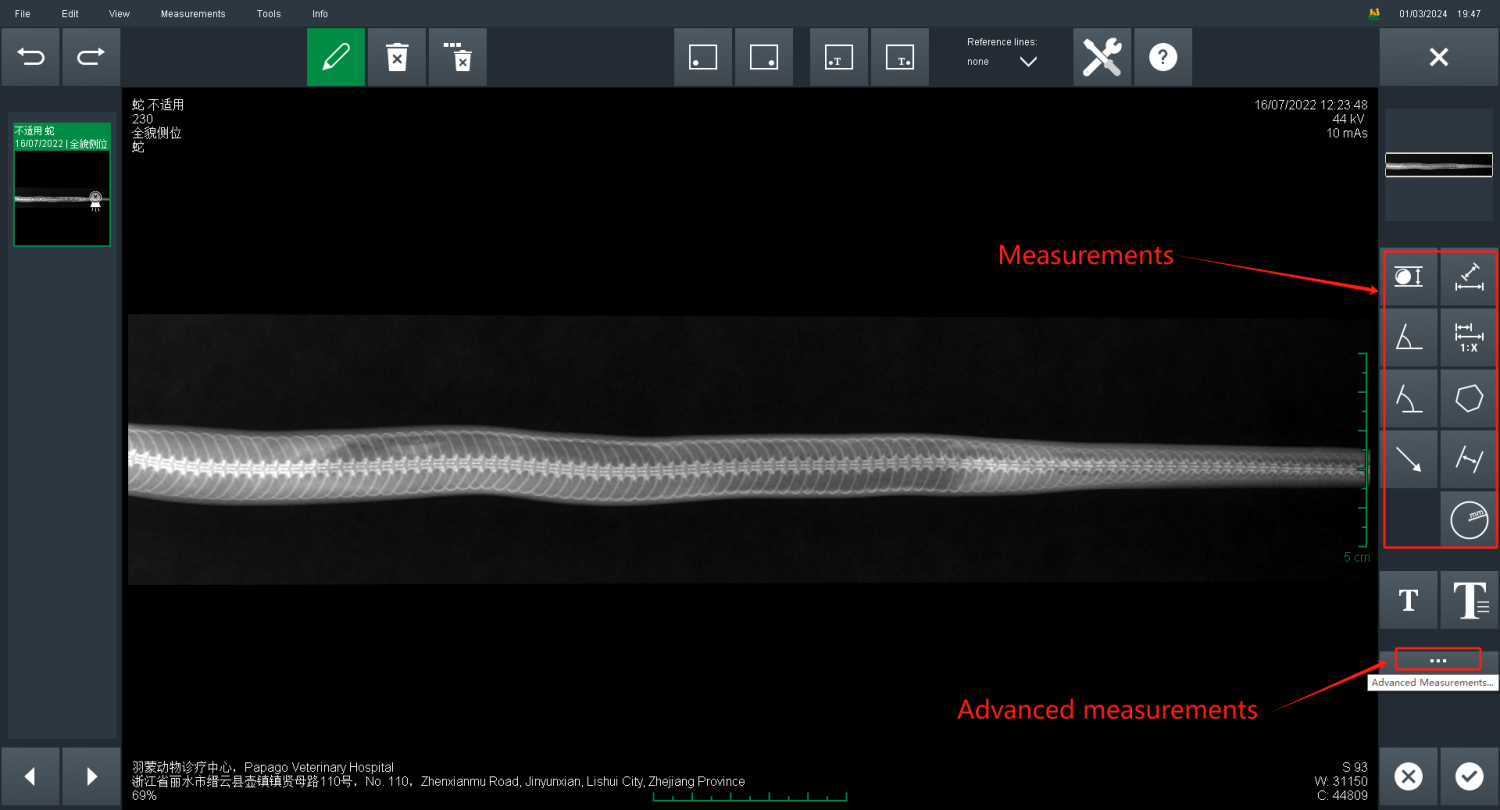
11.Measurements
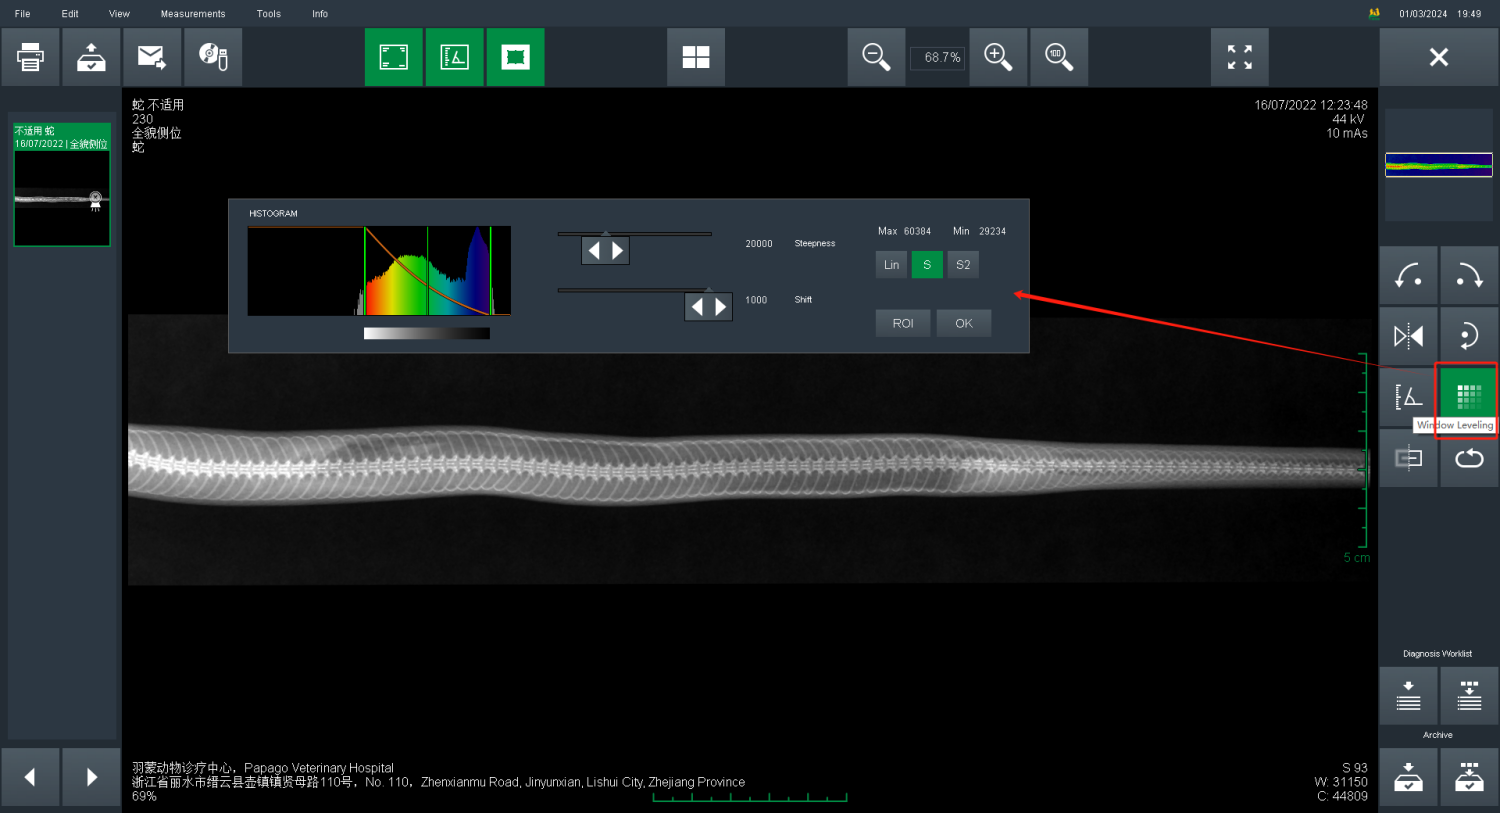
12.Adjusting image contrast
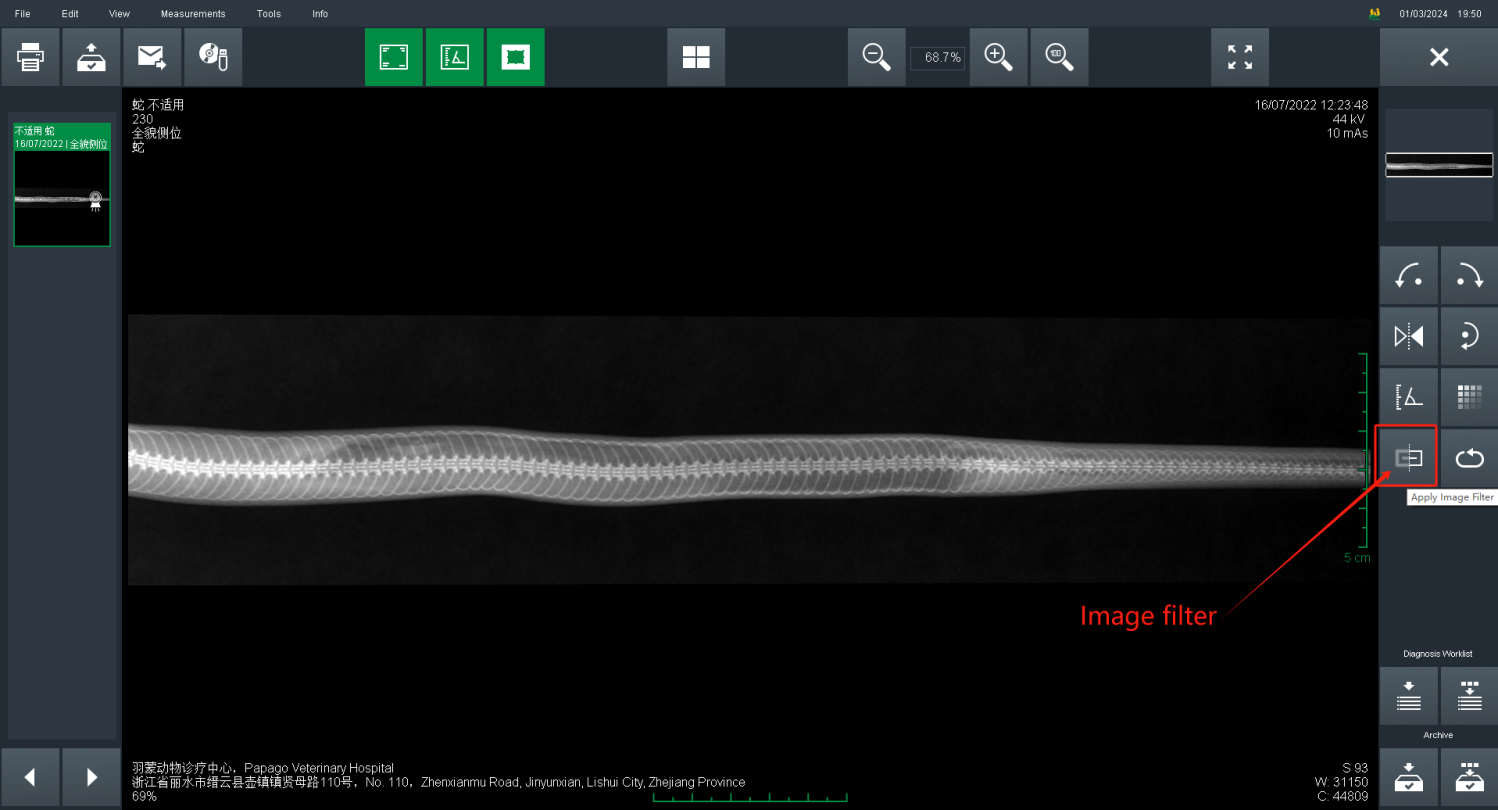
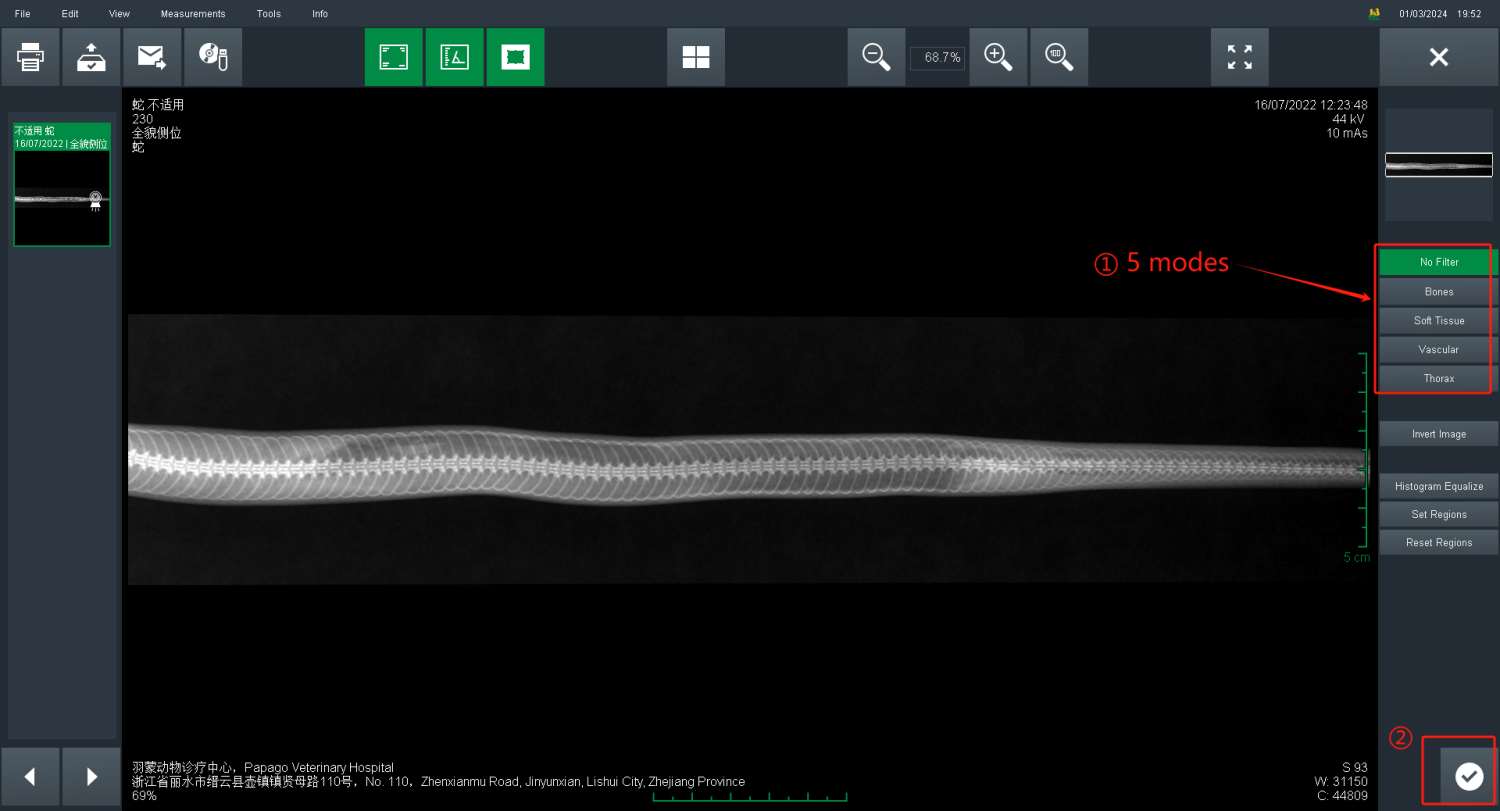
13.Image filter
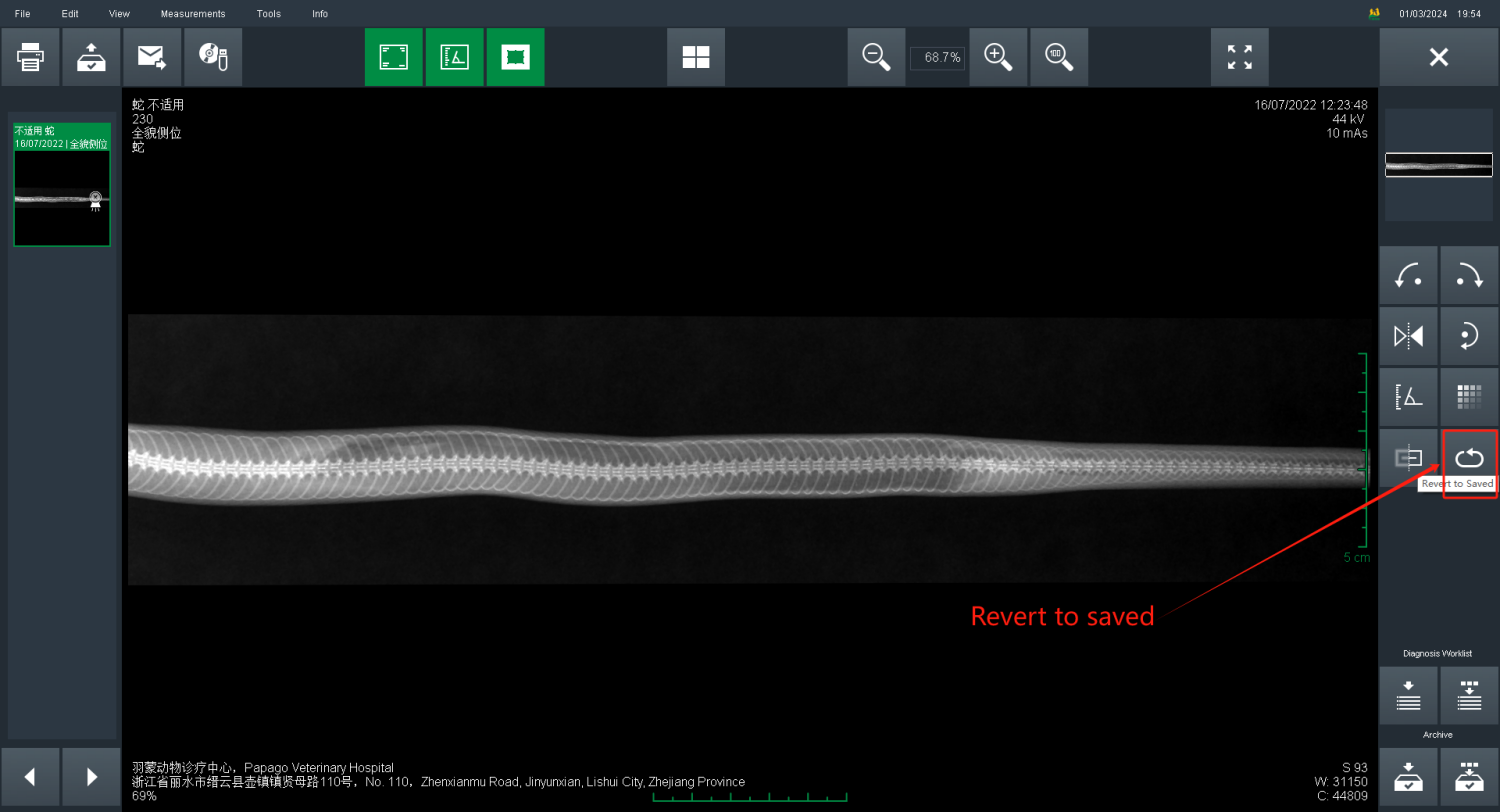
14.Revert to saved if not satisfied
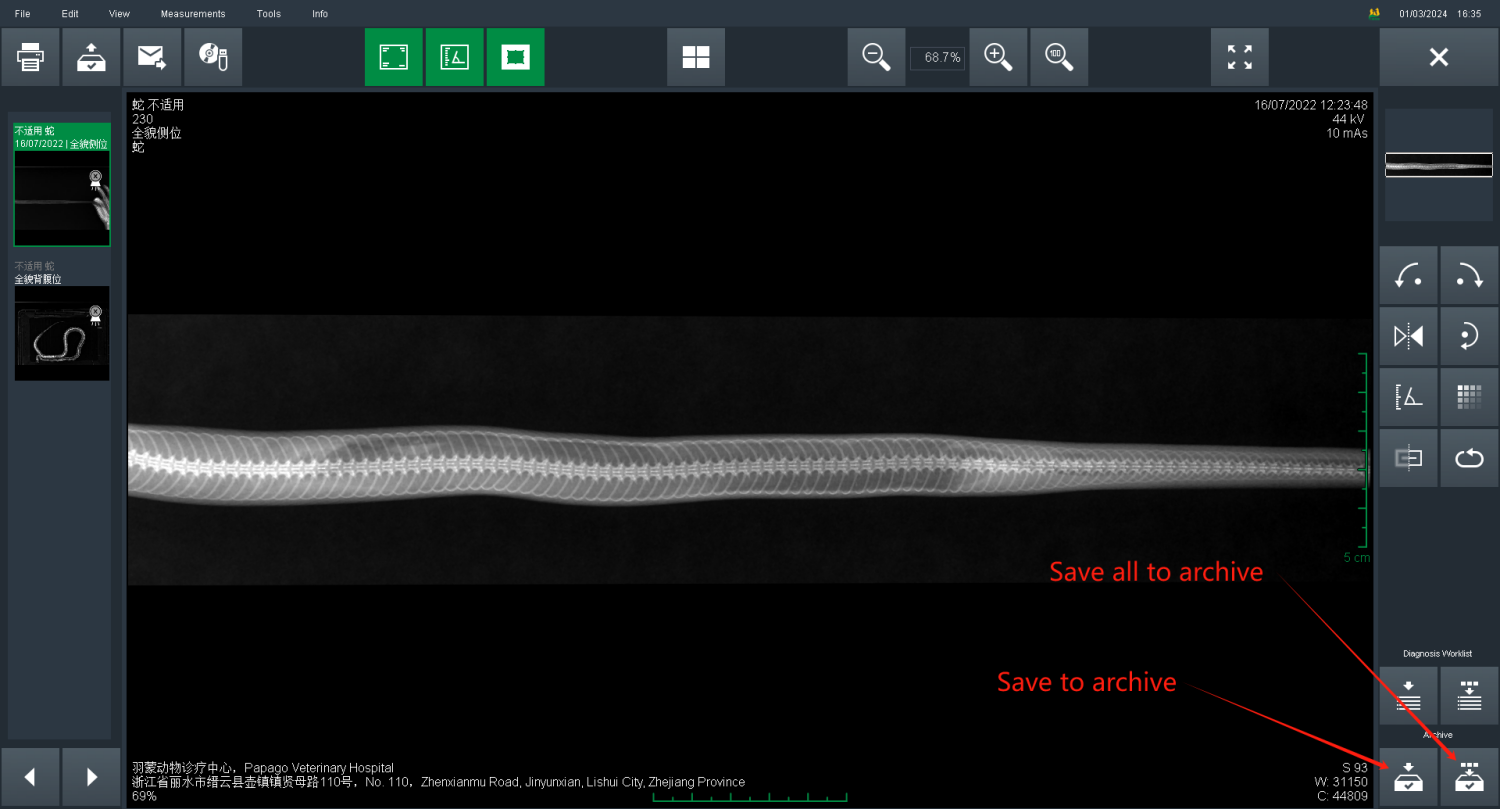
15.Save all images to Archive after image editor
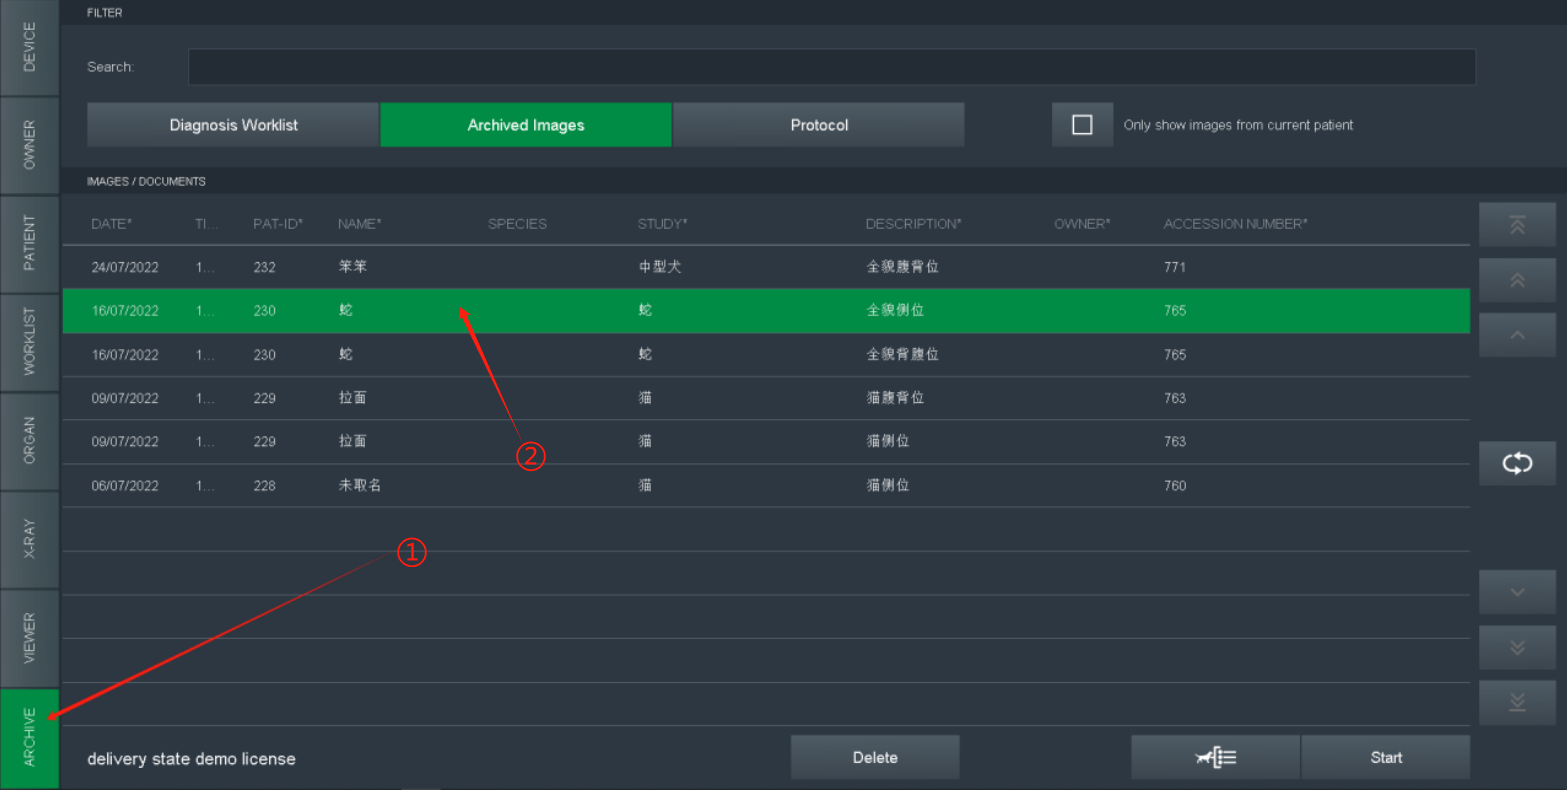
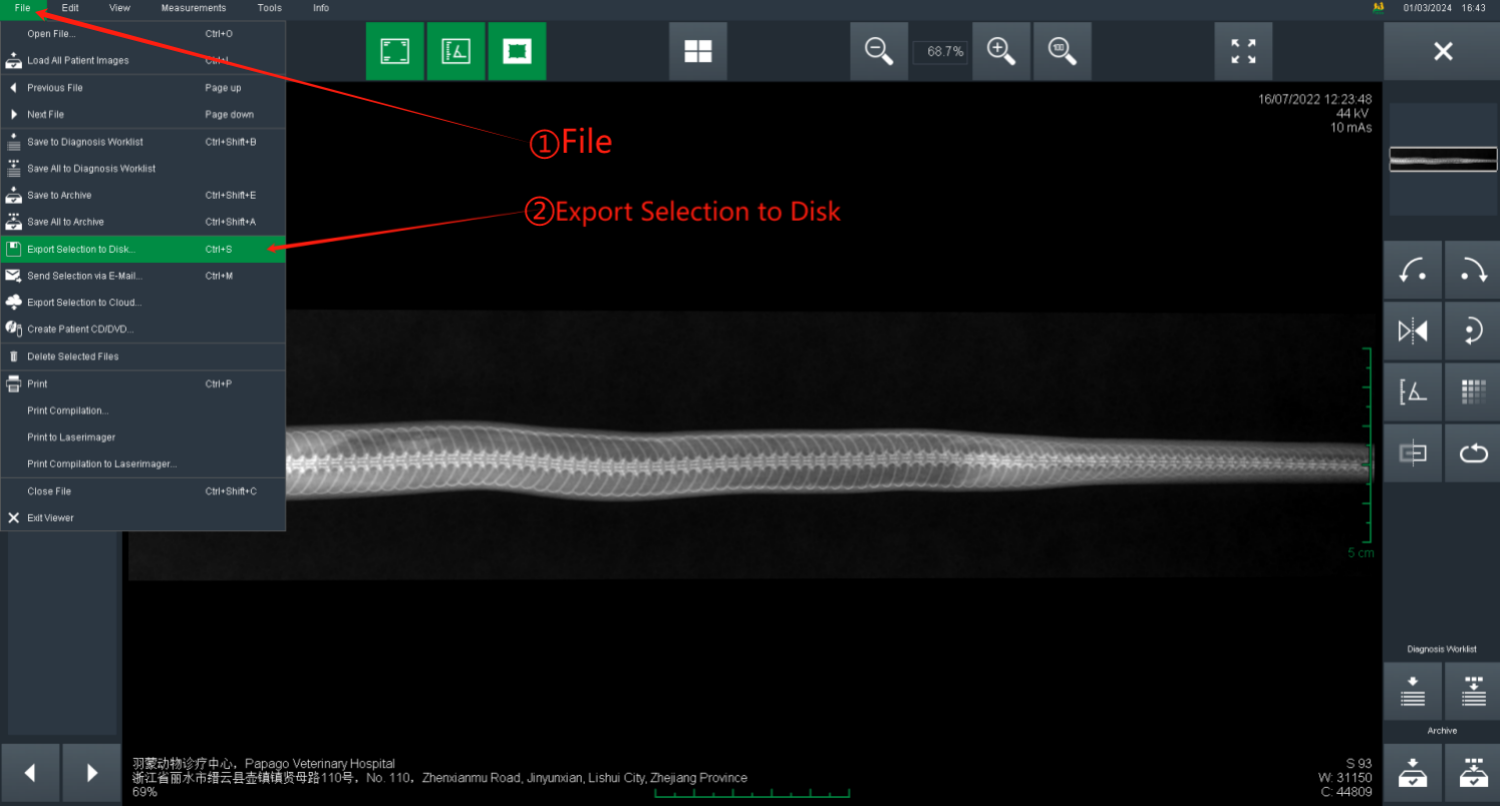
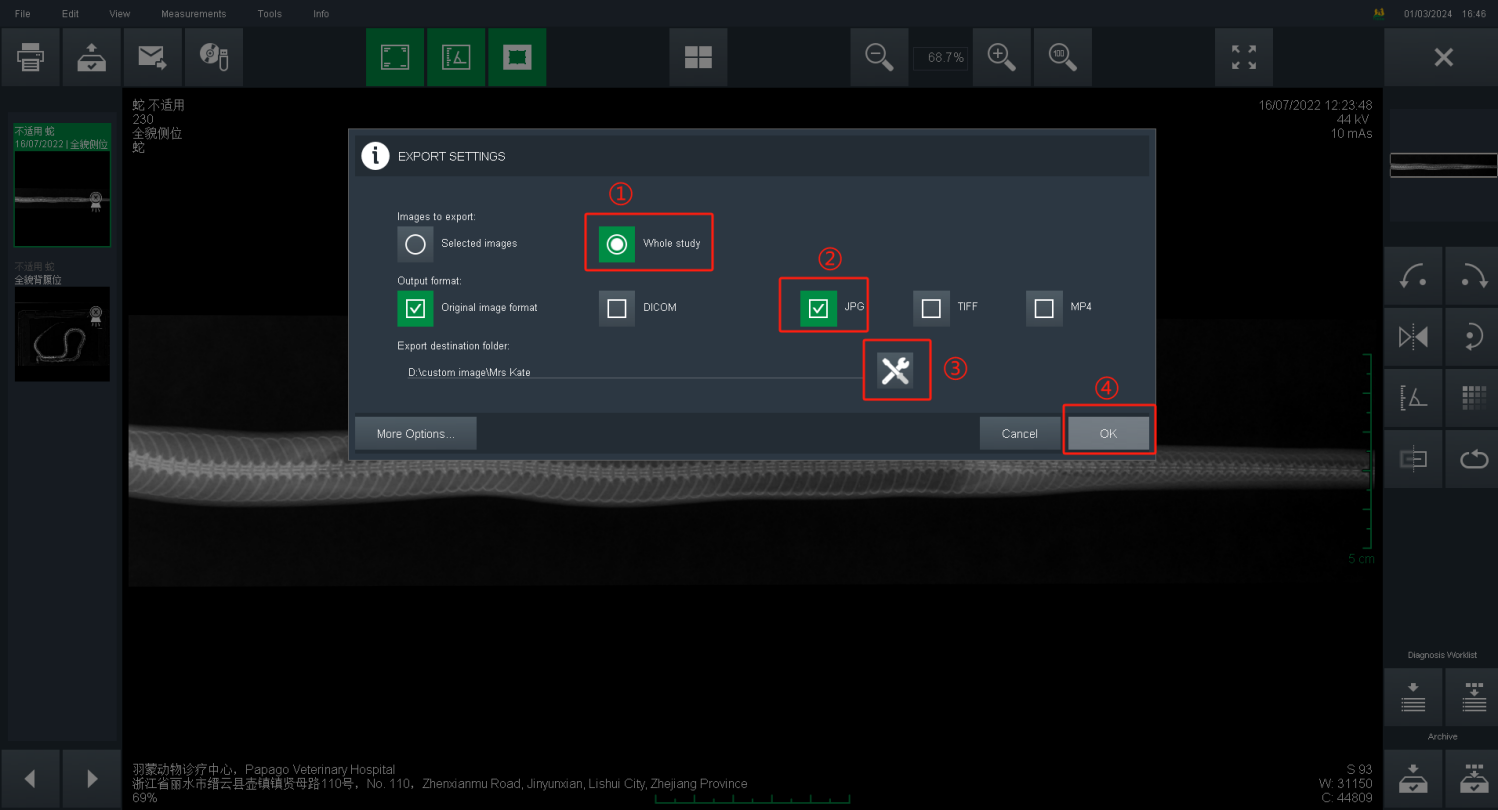
PARTⅢ:Image review and export
Click ARCHIVE , select target image for review or export
FINAL
Shutdown operation at the end of day.
Shutdown order:
Software –> PC –> Power of Floating Table –> Air Switch
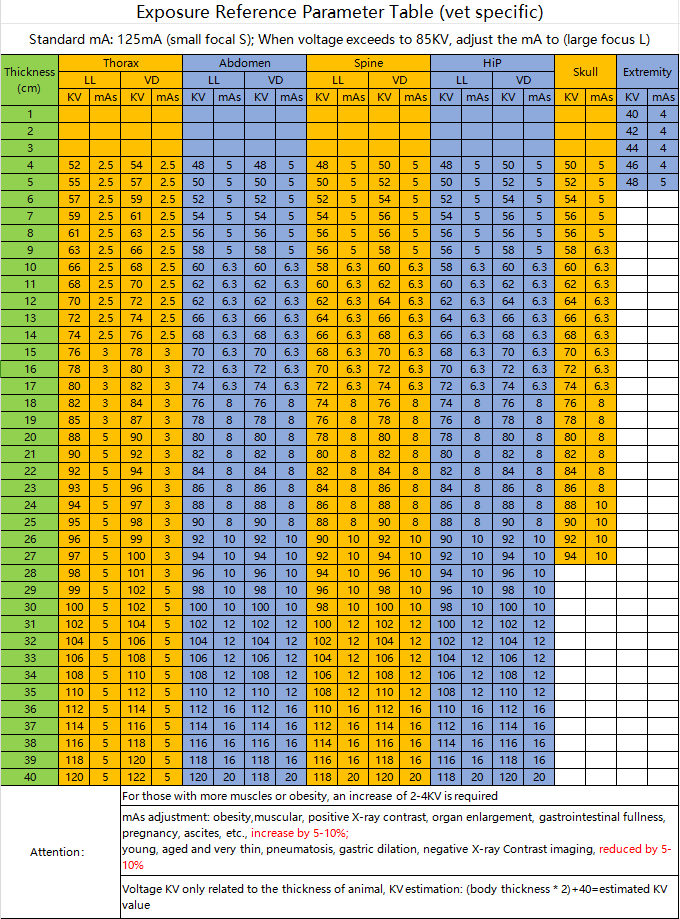
Attachment: Exposure Parameter Reference Table